|
To me, I define tessellations as a condensed arrangement of photos to create an abstract pattern. The first progress of creating tessellations is pretty easy, but it becomes more difficult and time-consuming. The directions to create a tessellation in photoshop are:
0 Comments
From going to the duckpond, I learned that portraiture is technical and that a reflector does make a big difference. Well, the shot list Mrs. Moncure gave us helped me decide the poses. My group and I decided to just split the poses by row. It was very helpful because I didn't have to think of my own poses for the model. The only artistic choices I had to make were the background, the lighting, and the aperture. I used the reflector to create more light on the model. It was very useful, it created a flattering light to my model's face. To retouch the photo, in photoshop, I selected only my models face. From there, I did a surface blur which cleared the face with any blemishes. After some research, a portrait picture might be artistic, or it might be clinical, as part of a medical study. Frequently, portraits are commissioned for special occasions, such as weddings or school events. Portraits can serve many purposes, from usage on a personal Web site to display in the lobby of a business. The salary of a portrait photographer could range from $30,000 up to $68,000 depending on the position.
The average price for someone taking portraits ranges from $130 to $500 dollars depending on many factors. 1. I brought an açaí bowl from Jamba Juice. For props, I also brought a teal plate, a spoon, and a bag of mixed nuts.
2. 5 things I learned from the video 1) How tedious and meticulous it is 2) How photographers replace food to efficiently enhance qualities
4) The way photographers prepare for a photo, with the wax for the beer bottle and the way the food designer placed cheerios one by one on a spoon. 5) Lighting is key 3. I did the bird's eye shot, which is most typical with açaí bowls. By the time we took our photos, the bowl was completely melted so I added the blueberries to make it look a tad more appetizing. 4.
5. Pretty much every business with food or drinks: McDonald's, Denny's, alcoholic advertising. Everywhere. 6. I think I was successful more or less with the bird's eye shot of the bowl. Yes, this is something I would do again because I enjoyed placing every prop with a purpose. 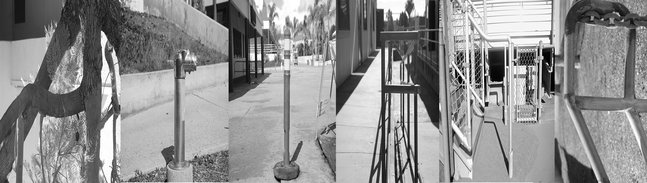 After I adjusted the color and size in iPhoto, I dragged each letter to photoshop one by one. It was a matter of scaling so that the photos were in the margins. The first time I completed my name, the letters were distorted so Mrs. Moncure gave me the approval to adjust my letters outside the margins. Once the letters were aligned, I merged all layers together. In photoshop, I was at first I unclear with where the margins were. While taking photos, I struggled with finding an N. I was proud in finding my three A's easily, which is what I like best out of the final product. I probably could have found something that had a more distinct N. Also with proportioning each letter more similar with the others.
Future Career: 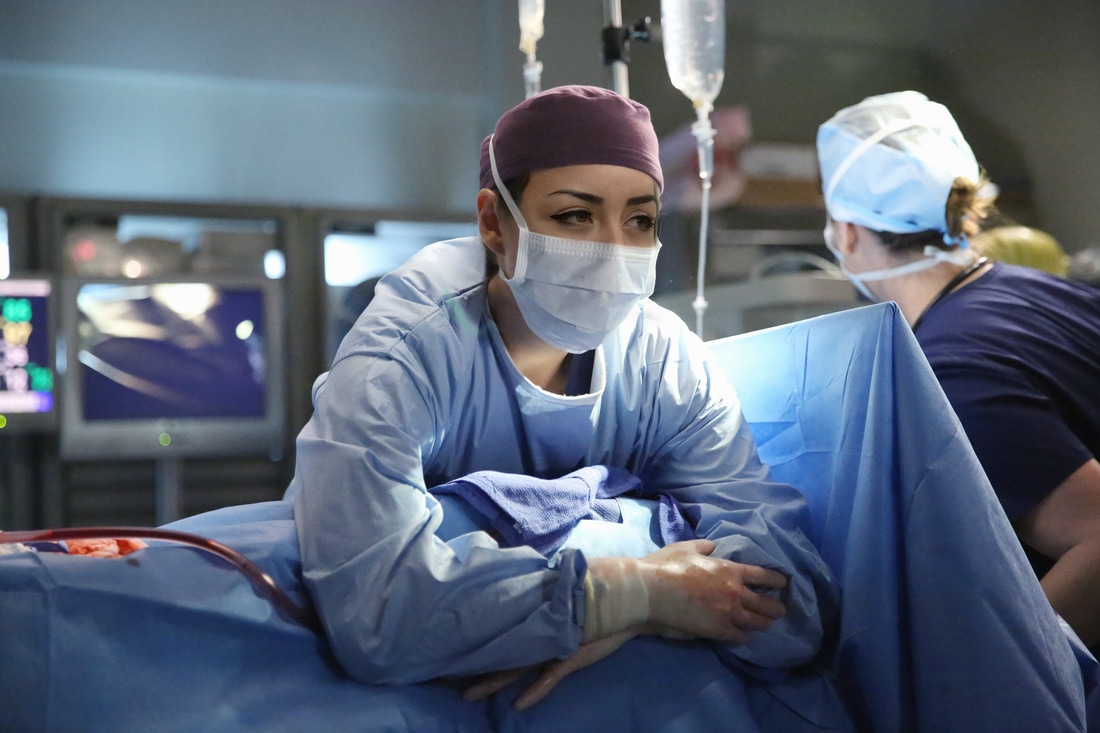 This photograph depicts what my future will consist of. As a surgeon at UCSD, an ideal day would be at the hospital helping patients. I'd spend most of the day at the hospital and in and out of the OR. My career as a surgeon/doctor would be busy and probably stressful. But I like being busy, I work better with a busy schedule than with more free-time. Either as a surgeon specializing in General or Pediatrics, my ultimate goal would be to help everyone. I'd want to be the doctor people come to knowing they wouldn't have to worry about cost if that were to be an issue . As a celebrity: 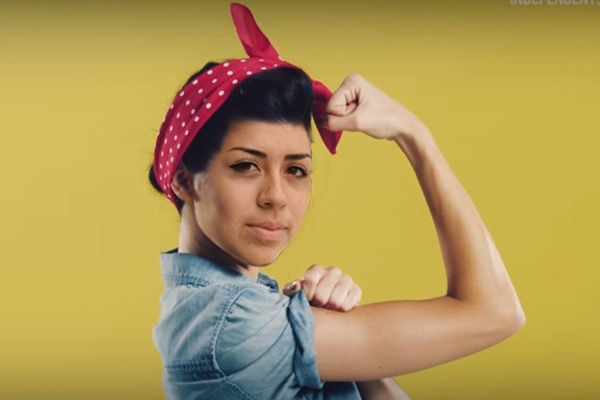 I chose to photoshop myself as Rosie the Riveter because she's a symbolic character for the pivotal change in women's lifestyles during WWII. Although she's fictional, she represents women in the workforce, changing the life as a housewife to a woman able to earn her own money. SInce I'm very passionate about feminism, I took the opportunity to place my face as a nfluential and priceless symbol for women in the workforce. In Photoshop:
Before and After of Rule of thirds Before and after of Crop Before and After of Framing Before and after of Leading Line Before and after of Symmetry The after of my photo is the result of photoshop to create an HDR photo. HDR stands for high-dynamic-range photograph.For every photograph, the camera had to be secured on the tripod. Once I figured out where and what I wanted to take my photograph, I had to take the same photography five times. Each photograph had to be changed to a different exposure.The five different exposures were: -1.0, -0.5, 0.0, +0.5, +1.0. Once in photoshop it was a process but the computer did most of the work. 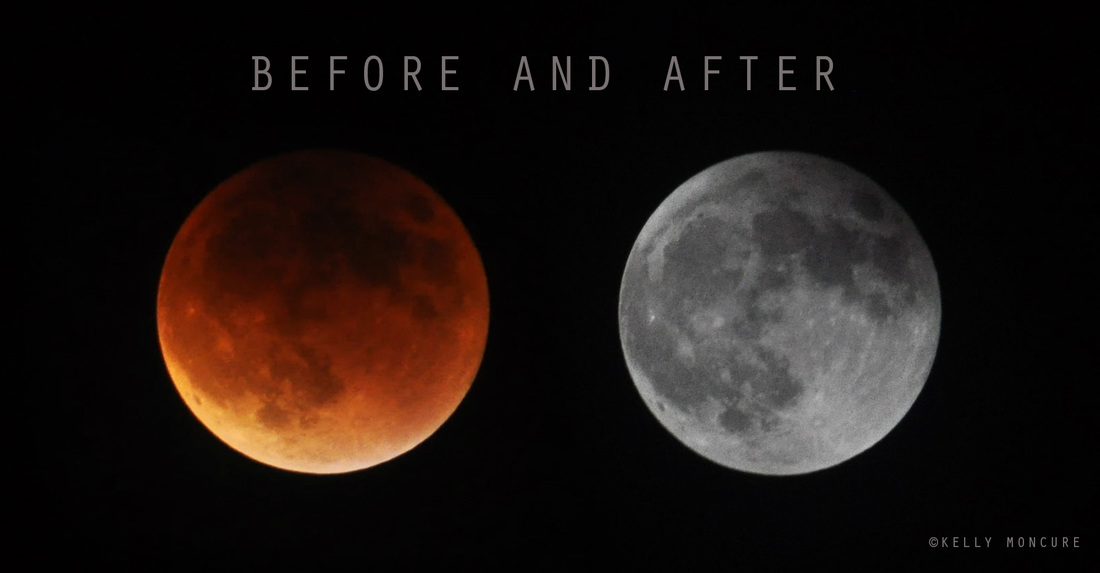 Blood Moon Lunar Eclipse, September 27, 2015. Left image: 70-300mm lens @ 270mm, ISO 1000, aperture f/5.3, shutter speed 1.3 secs. Right image: 70-300mm lens @ 300mm, ISO 800, aperture f/13, shutter speed 1/1250 sec.
To photograph the moon: 1. Use a tripod! A flat surface will only allow you to shoot straight, and shooting the moon means that you'll be shooting up and constantly re-adjusting the tripod as the moon moves throughout the night. 2. Use a shutter release cord, remote or the camera's self timer if you don't have one, so that you don't move the camera when pressing the shutter release during a long exposure. 3. Use a zoom lens and zoom in as much as you can to the moon. It's okay if it's not a super fancy lens, this was shot using a 15 year old $100 lens. Focus in on the craters and details on the moon. 4. ISO 1250- 1600, so that you can use as fast a shutter speed as you can without losing detail-the longer the shutter speed, the more chances you have the camera will shake even slightly in the wind, resulting in an out of focus photograph. 5. Aperture priority of f/5.6 since you are not worried about capturing any details other then the moon. 6. Bracket your exposure, meaning over expose and underexpose the photograph from what the camera is telling you. Generally the camera will overexpose the moon, so you'll get nothing but a white blob in the sky. Use the exposure compensation button (the +/- button below the shutter release) and change the exposure to -0.5, then -1.0, then -1.5 and so on, until you start seeing detail in the moon. You may go as far as -5.0 exposure compensation to get what you need. 7. Take a fair amount of photos and keep refocusing as the night progresses. The photographs may look focused on the camera's display, but you won't really see if they're completely in focus until you upload them onto your computer screen.  ISO 400, Aperture f/8, SS 1/800  ISO 400, Aperture f/8, SS 1/800 |
AuthorHigh school student learning how to capture priceless moments through a lens. Archives
May 2017
Categories |


 RSS Feed
